How Can I Printout All the Cards in Roboform
RoboForm Manual for iOS Mobile Application
Current through RoboForm Version eight.iv.1. To access the most up-to-date information about the current version of RoboForm visit our Help Middle.
Printable Manual is bachelor in PDF
Table Of Contents
- Installation and Account Setup
- Key RoboForm Terms
- Logins
- Saving Logins
- Using Logins
- Bookmarks
- Saving Bookmarks
- Using Bookmarks
- Identities
- Creating and Editing Identities
- Using Identities
- Contacts
- Safenotes
- How to Create a New Safenote
- Using Safenotes
- First Folio
- Upper Toolbar
- RoboForm Data Menus
- Offset Folio Items
- Lower Toolbar
- RoboForm Web Browser
- Using the RoboForm Spider web Browser
- Password Generator
- Sharing and Sending
- Sharing Center
- Sharing
- Sharing a Folder
- Sending
- Security Center
- Agreement the Security Center
- How to Improve your Security Score
- Emergency Access
- How to Ready Emergency Access
- How to Utilise Emergency Access
- Preferences
- General
- Security
- Web Browser
- Sharing Centre
- Security Center
- Emergency Access
- RoboForm Everywhere
- Start Page
- RoboForm Online
- RoboForm Security
Affiliate 1: Installation and Account Setup
- Requirements RoboForm is compatible with iOS 8 and in a higher place.
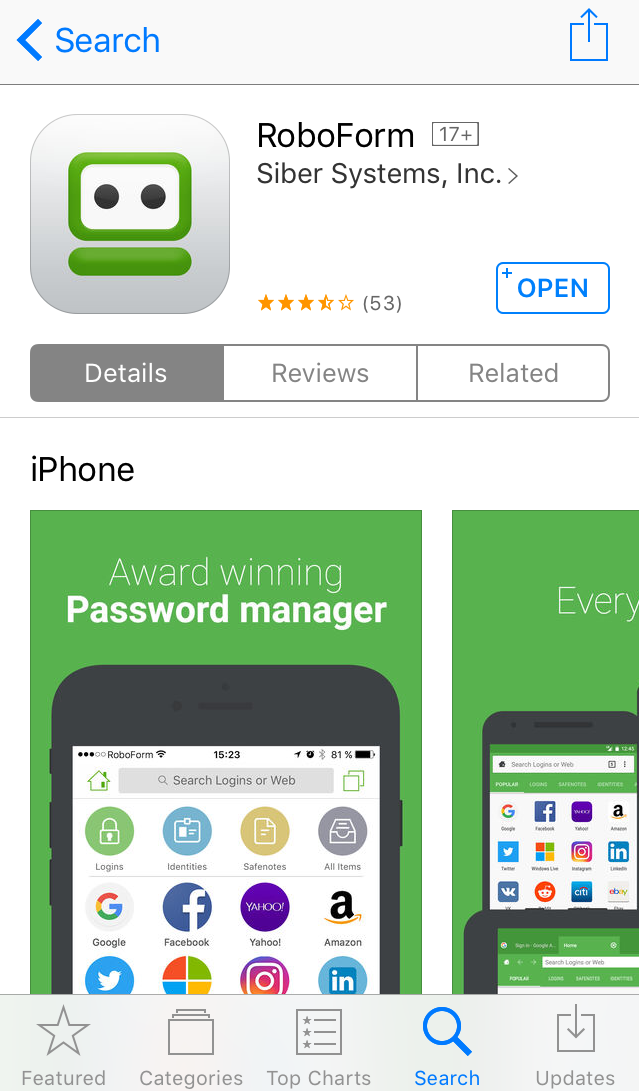
- Open the App Store on your iOS device.
- Search for RoboForm.
- Click + Get and await for the download to finish.
- Your RoboForm application will appear on your iOS device'south home screen.
- Launch the application past clicking the RoboForm application.
- On the Welcome page of the app, you have a couple of options for Account Setup.
- You tin Sign In with an existing RoboForm account by typing in your User ID and Business relationship Password (if you're using version 7) or Email and Master Password (if you're using version 8)
- Swipe through the secure methods of accessing your RoboForm application and select which method you would like to use.
- Your RoboForm awarding is at present set up.
Chapter 2: Key RoboForm Terms
Login RoboForm saves online passwords into what we call a Login. RoboForm will offering to fill your Login details automatically when you lot visit the login page again.
Bookmarks Bookmarks are websites and spider web pages y'all can save to RoboForm, similar to a Bookmark on your browser. Bookmarks leave you i click away from your favorite web pages.
Identity Your Identity is your personal contour. RoboForm can automatically fill in long not-password forms, such every bit an online checkout grade, with your Identity.
Contact This is your Accost Book, each entry in this Address Book is called a Contact. A Contact is similar an Identity but is not used for grade filling. Instead, information technology is used to lookup other people's personal data such as their proper noun, phone number, address, etc.
Safenote You can store frequently-used text into what we phone call a Safenote. Safenotes provide storage for important information that is not automatically stored in Logins or Identities such equally lock central combinations, surreptitious family recipes, and software activation codes.
RoboForm Data All of your RoboForm Items - your Logins, Bookmarks, Identities, Contacts, and Safenotes - make up your RoboForm Data.
Binder All of your RoboForm Items can be categorized in Folders, similar to Windows Folders. Anything file of RoboForm Data exist organized into Folders - including other Folders!
Master Password This is the main password that unlocks all of your RoboForm Information for use. Practise not forget your Master Password!
Beginning Folio This is the master folio of the RoboForm application that allows you to edit and view your RoboForm Data.
RoboForm Web Browser This is the browser within the RoboForm application. You are able to save, fill up, and submit forms within the RoboForm Browser.
Asterisk Button This button opens Matching Logins, Identities, and Contacts when you are using the RoboForm Browser.
Matching Login In the Asterisk Push button, Matching Login finds which Login is the best fit for the web page you lot are visiting.
Preferences This menu holds many RoboForm options and features such every bit Sharing, Security Centre, and Emergency Access.
Relieve Screen This is the screen that allows yous to salve RoboForm Logins and Bookmarks in the awarding.
Affiliate three: Logins
Use Logins to store information that is specific to a web site; information such every bit Usernames, Passwords, Survey fields, etc. Essentially, you can salve whatever form information to Logins and use it to automatically fill any form subsequently.
Saving Logins
AutoSave a Login
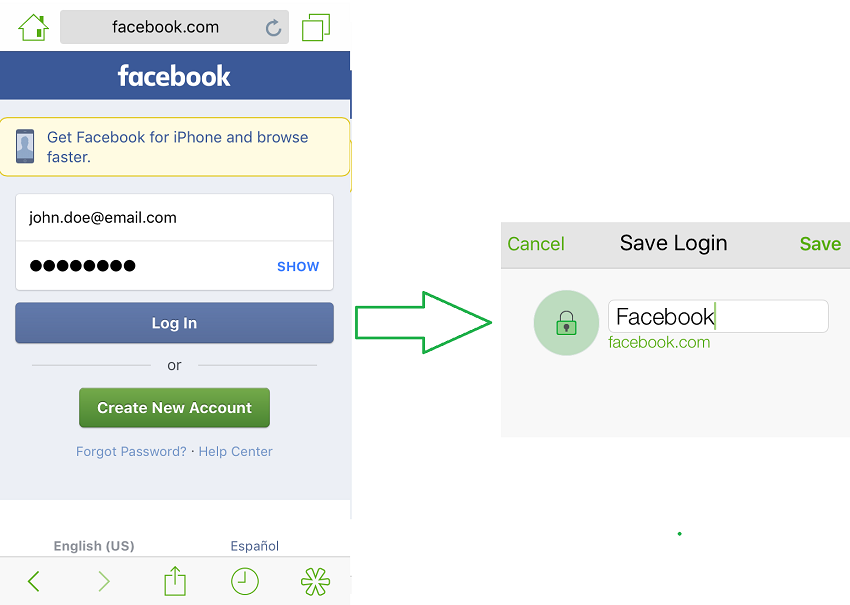
When you manually enter login data to a login page and click the Login (Submit) push button, RoboForm will offer to save this login info by displaying the Save Screen.
- How to AutoSave a Login
- Manually login to a website in your RoboForm Spider web Browser.
- The Save Screen will open. Yous can rename the Login proper noun hither.
- Click Relieve.
- The Relieve Screen will close and your Login will salve.
If you lot endeavour to salve a Login that has the same proper name equally an existing Login, y'all volition exist shown a warning that says saving the Login will overwrite the information of your existing Login.
If the domain is blocked, RoboForm will non enquire to save Logins automatically. You tin can find and remove blocked domains in Preferences > Web Browser > Blocked Domains.
The Save Screen pops upwards but if the Login data you entered is New, Unlike, or Updated. It will non prompt you lot if the verbal same data (E.g. Username & Password) are already saved to RoboForm.
New Account Detection
RoboForm can salvage your Username and Password from the page where you lot create a New Account into a Login. Even though it'southward not the exact login page, AutoSave volition pop up on your New Account or Registration page.
Password Change Detection
This also works with irresolute your Countersign on an existing business relationship; Salve Screen will offer to relieve your new password and overwrite your sometime countersign in Logins.
Manually Relieve a Login
On the occasion that the Save Screen doesn't pop upward - because of a blocked domain or the website'south format - you can manually salve a Login.
Updated Website You might have to do a Manual Salvage of a Login if the website's login folio has been changed or updated. Just manually login, and on the Save Screen overwrite the original Login.
Using Logins
One-Click Login
RoboForm can do the entire Login sequence for y'all.
Simply find your Login in the Start Folio or the Login Carte du jour, which can be found at the top of the Kickoff Folio, and click it. The web folio volition open in the RoboForm Web Browser and RoboForm will log yous in.
Login Menu
This is the main bill of fare for viewing, using, and editing Logins.
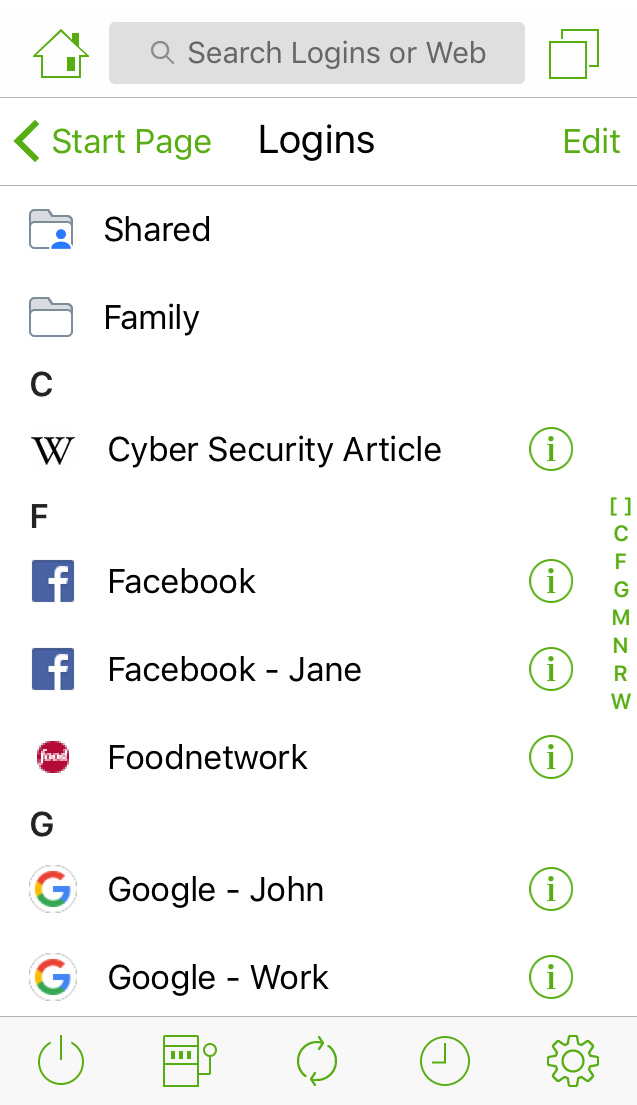
To the left of the Logins title, in that location is a button to go back to the Start Page.
- To the right of the Logins title, in that location is an Edit button. Clicking information technology will give y'all the following options:
- Create a new Binder at the top. Clicking this volition add a Folder and ask you lot to rename information technology. Click done once you lot accept named it.
- Delete Folders and Logins. To delete a Login, click the Red Circle to the left of the Folder or Login Proper name, and and so click Delete. The Login or Folder will exist deleted.
Folders are shown at the top of the Logins Menu. Subsequently Folders, all of your Logins are organized alphabetically.
Every bit mentioned before, clicking on a Login will automatically open the web page and practice the unabridged Login sequence for you lot.
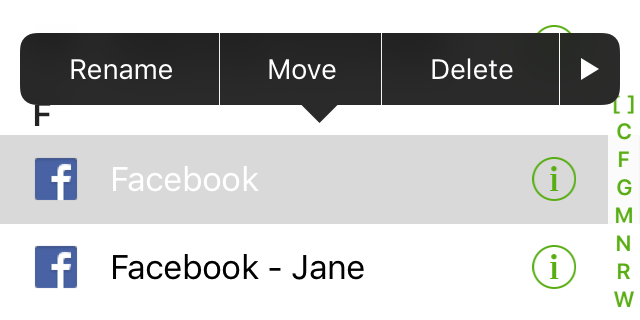
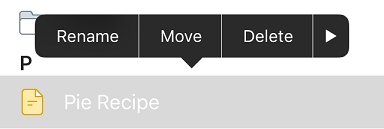
- Property down on a Login will open the following carte du jour:
- Rename alter the proper noun of the Login.
- Move allows you to motion the Login to some other Folder.
- Delete removes the Login.
- Add to/Remove from Commencement Page will add together or remove the Login to the RoboForm Outset Page.
- Sharing opens the Login in the RoboForm Sharing Middle.
- Send opens the Login in RoboForm Sending. Read more about Sharing and Sending in Chapter xi: Sharing and Sending.
In that location is an Info Icon next to each Login. Clicking it will open up the Edit Screen for the Login.

Matching Logins
When you visit a website in the RoboForm Web Browser, the Asterisk Button volition bear witness the Login that best matches your website. This is called a Matching Login.
If you have multiple Matching Logins, they will all appear in the Asterisk Push.
Simply click the Matching Login to automatically login to the page on the RoboForm Web Browser. Read more than about this in Chapter 9: RoboForm Web Browser.
Chapter 4: Bookmarks
Use Bookmarks to store web addresses (URLs) in order to be a click away from your favorite pages and articles.
Saving Bookmarks
How to Save Bookmarks
Using Bookmarks
Note: Bookmarks are found in the Logins Menu.
The Logins Menu is the main carte for viewing, using, and editing Bookmarks. The menu and its features are explained in a higher place in Affiliate 3: Logins.
- Holding downward on a Bookmark will open up the following menu:
- Rename change the name of the Bookmark.
- Move allows you to movement the Bookmark to some other Binder.
- Delete removes the Bookmark.
- Add together to/Remove from Start Page will add or remove the Bookmark to the RoboForm Start Folio.
- Sharing opens the Bookmark in the RoboForm Sharing Centre.
- Send opens the Bookmark in RoboForm Sending. Read more about Sharing and Sending in Chapter 11: Sharing and Sending.

There is an Info Icon next to each Bookmark. Clicking it will open the Edit Screen for the Bookmarks.
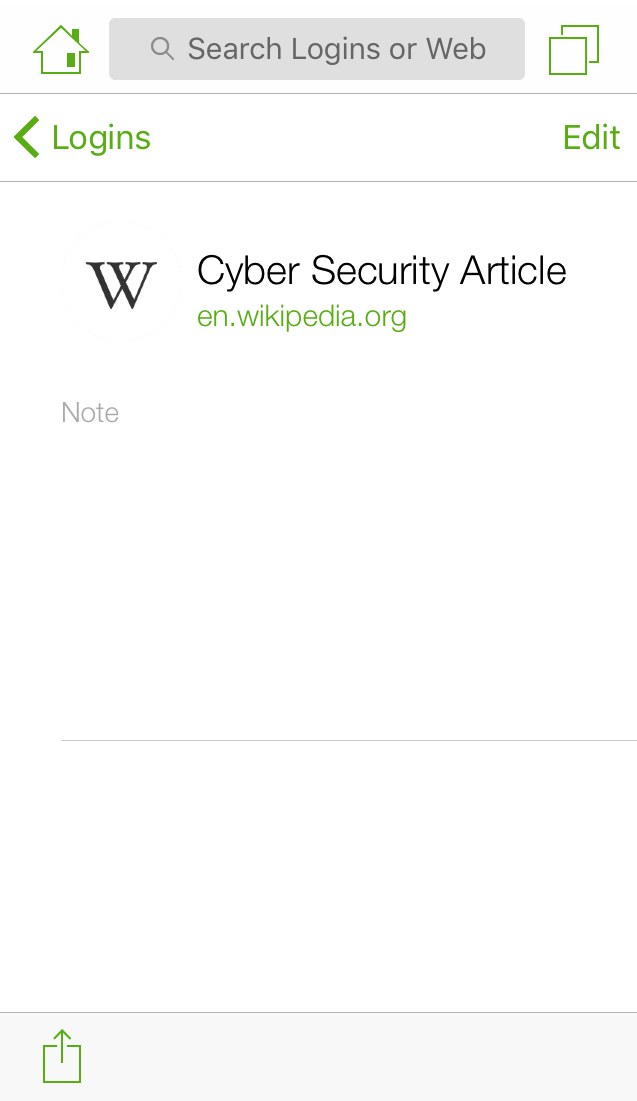
- The components of the Edit Screen are as follows:
- A Logins push button that will take yous back to the Logins Carte du jour.
- An Edit button. Clicking information technology will allow you lot to change the Name of the Bookmark, the GotoURL, the MatchURL, and lastly a Annotation.
- The Edit push also has a delete button at the lesser right of the folio.
- Click Washed in the top correct when you are finished editing.
- The GotoURL is highlighted in green text below the Bookmark name. Clicking it will automatically take y'all to the website.
- The Action Icon in the bottom left corner opens a carte du jour with the post-obit options:
- Go To volition open up the website.
- Sharing volition open the Bookmark in the Sharing Centre.
- Send will open the Bookmark in the Sharing Heart. Read more in Affiliate 11: Sharing and Sending.
- Add together to Home Screen volition add this Bookmark as a Safari shortcut button on the home screen of your iOS device. Clicking it will open Safari and prompt yous to click the Action Icon to add together it to your habitation screen
Affiliate 5: Identities
RoboForm can automatically fill up long not-countersign forms (E.thousand. Online Shopping Checkouts, Sign Upward Forms) with information from your Identity, which is like a personal profile.
Your principal tool for creating, using, and editing Identities is the Identities Menu at the height of the Showtime Page.

Clicking on an Identity in the Identity Menu will open the Identity Elements (E.g. Person, Concern, etc.) that make up that Identity.
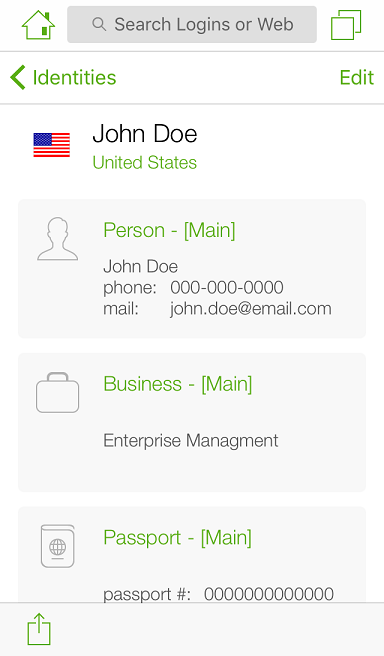
Each Identity Chemical element (E.g. Person) is made up of individual Identity Fields (Eastward.g. Phone), or distinct personal details. Clicking on an Identity Element will open up the Identity Fields.
- Here nosotros will explicate each Identity Chemical element:
- Person has Identity Fields associated with an individual such as proper name, date of birth, SSN, phone number, etc.
- Business is the business organisation entity that the Identity is associated with.
- Passport is your Identity's passport.
- Address is your Identity's physical location.
- Credit Carte du jour is your Identity's credit card(south).
- Bank Account is your Identity'southward bank account(due south).
- Machine is to store information well-nigh your Identity's car(due south).
- Hallmark stores your favorite usernames, passwords, and security questions for creating new accounts. Annotation: Nosotros strongly discourage reusing a password for multiple accounts.
- Custom is for any other fields that are non covered in RoboForm
- How to Use the Custom Identity Element
- Fill up the Field Name with the question of the field (Eastward.g. Username).
- Fill up the Field Value with your response to the question of the field (E.g. JohnSmith).
- Other Matching Strings is for an boosted Field Name that RoboForm should besides detect (E.g. Field Proper name: Username...Other Matching Strings: User ID). When RoboForm detects an Other Matching String term, information technology will fill it with the Field Value.
- Click the Save at the top of the page to save your Custom Course.
-
- Here are more than important notes most using Custom fields:
- RoboForm will remove all punctuation (, . - ! ?) in your custom fields when it fills forms.
- For a Field Value with a checkmark (Eastward.k. Are you over xviii?...✓), fill up in the Field Proper name with the question (Are you over xviii?), and the Field Value with an asterisk, or *.
- Radio Buttons allow you to merely select one option out of a list (E.g. Married, Single, etc.). To create a custom field for radio buttons, but fill your Field Value with the question (E.g. Marital status) and the field name with your answer (E.g. Single).
Note: You don't have to enter any dashes or spaces for Identity Fields with numbers (Eastward.g. telephone numbers, driver license number).
Creating and Editing Identities
How to Create an Identity
How to Add and Edit Personal Details in Identity
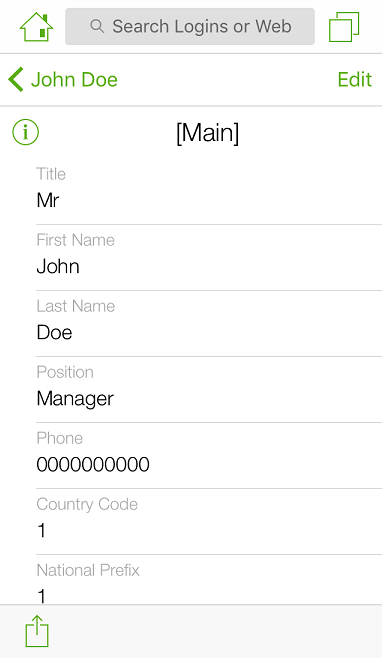
- Open your Identity from the Identity Carte.
- Open an Identity Element and click Edit to fill out or edit the Identity Fields within.
- Click Done when y'all are finished with the the Identity Element.
- Repeat with other Identity Elements.
Multiple Identity Elements
If y'all have more than i credit bill of fare, bank account, etc, you can create multiple Identity Elements.
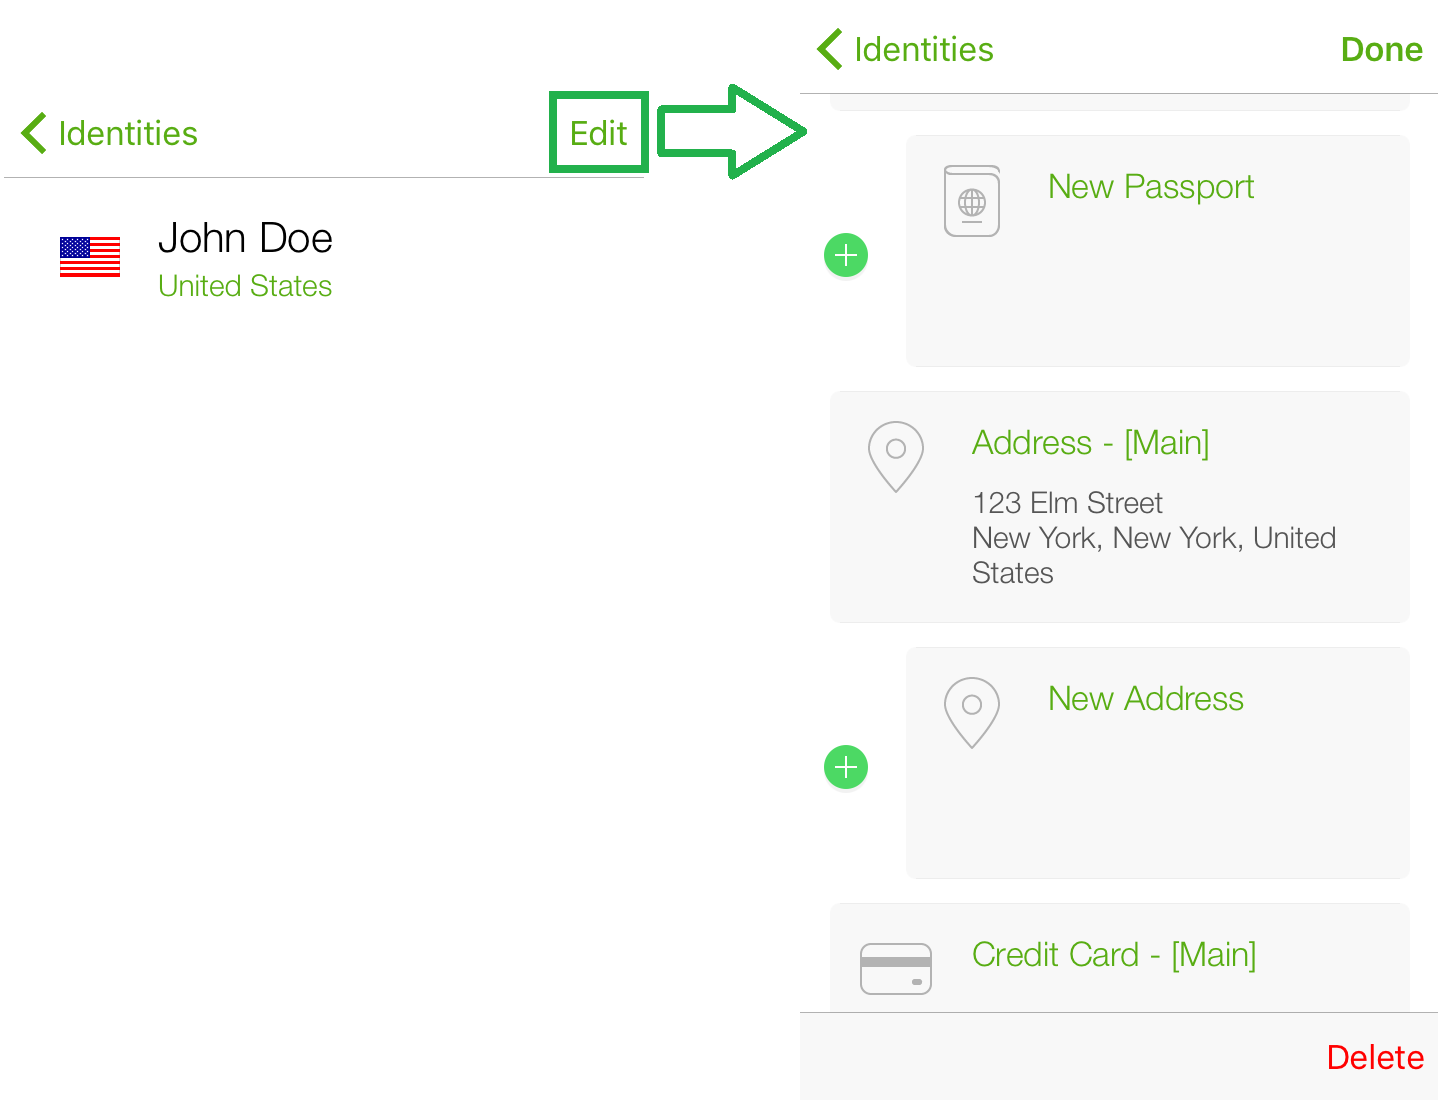
- How to Add another Element
- Open up your Identity from the Identity Menu.
- Click Edit in the top-right corner. An selection to add a New [Element] will appear beneath each main Element.
- Select which New [Element] you would similar to use by clicking the dark-green plus to the left.
- Proper noun your new element and select the other Identity Fields to type into them.
- Once you are finished inbound details, click Done in the top right corner.
Individual Identity Options
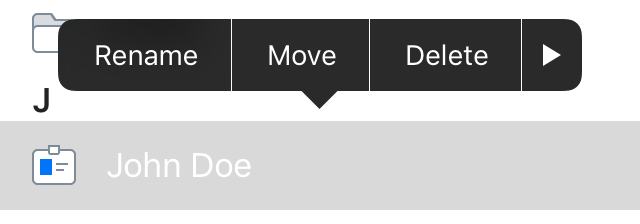
- Belongings down an individual Identity in the Identity Carte will show the following options:
- Rename change the name of the Identity.
- Move allows yous to movement the Identity to another Folder.
- Delete removes the Identity.
- Sharing opens the Identity in the RoboForm Sharing Middle.
- Send opens the Identity in RoboForm Sending. Read more about Sharing and Sending in Chapter 11: Sharing and Sending.
Using Identities
How to Fill Forms with an Identity
Contacts
Contacts are like to a phone-book. Store an individual's contact data here.
In the mobile awarding, Contacts are in the Identity Menu and are created and edited the same way equally Identities. Each Contact is composed of Contact Elements (Person, Business concern, etc.), and each Contact Element is fabricated of individual Contact Fields (Phone Number).
Dissimilar Identities, Contacts cannot be used to fill forms.
- Delight employ the steps in Chapter 5: Identities to Contacts in order to larn:
- How to Create a Contact
- How to Add and Edit Details in a Contact
- How to Add another Contact Element
- Individual Contact Options.
Chapter seven: Safenotes
- Apply Safenotes to shop whatsoever secret text information or annihilation that RoboForm could not salvage into Logins. Some instance Safenotes could include:
- Condom lock combinations.
- WiFi router Passwords.
- Software activation codes.
- Secret family recipes.
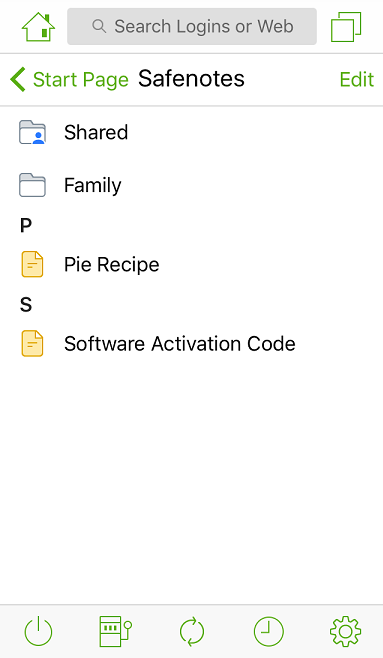
Your main tool for creating, viewing, and editing Safenotes is the Safenotes Menu at the top of the Start Page.
How to Create a Safenote
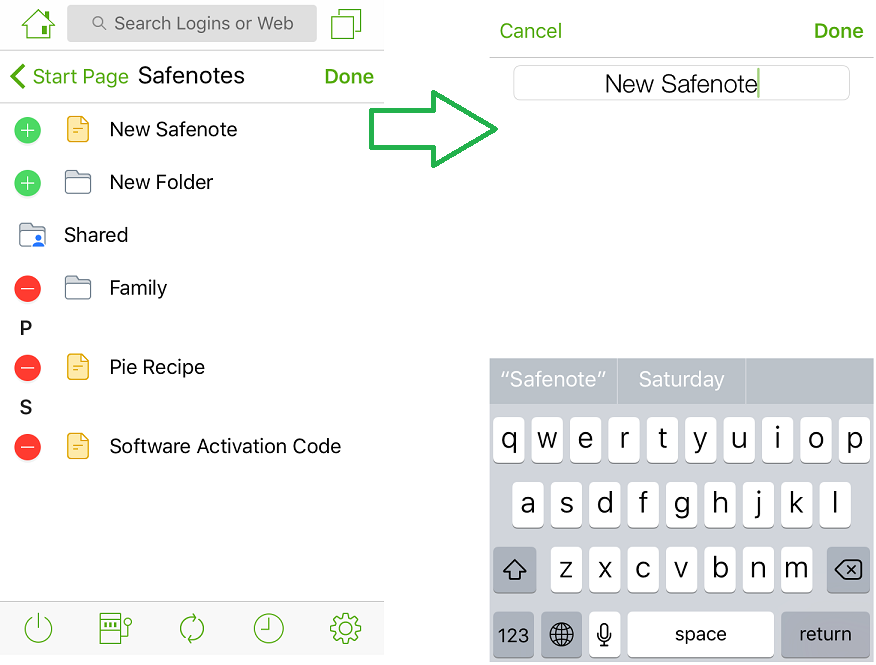
- Open the Safenotes Menu.
- Select Edit in the top correct corner.
- Click New Safenote.
- Name your Safenote.
- Enter the text of your Safenote underneath the name.
- Click Done in the height right in one case you're finished.
Using Safenotes
View Safenotes by opening them from the Safenote Menu.
Edit Safenotes by clicking Edit when the Safenote is opened. Type directly into the text.
Individual Safenote Options
Belongings downwardly a Safenote in the Safenote Menu shows the following options:
Rename modify the name of the Safenote.
Move allows you to move the Safenote to some other Folder.
Delete removes the Safenote.
Sharing opens the Safenote in the RoboForm Sharing Center.
Ship opens the Safenote in RoboForm Sending. Read more about Sharing and Sending in Affiliate xi: Sharing and Sending.
Chapter 8: Start Page
The RoboForm Start Folio is the main tool for viewing and using RoboForm on the RoboForm iOS Mobile application.
Here is the explanation for each component of the Showtime Page:
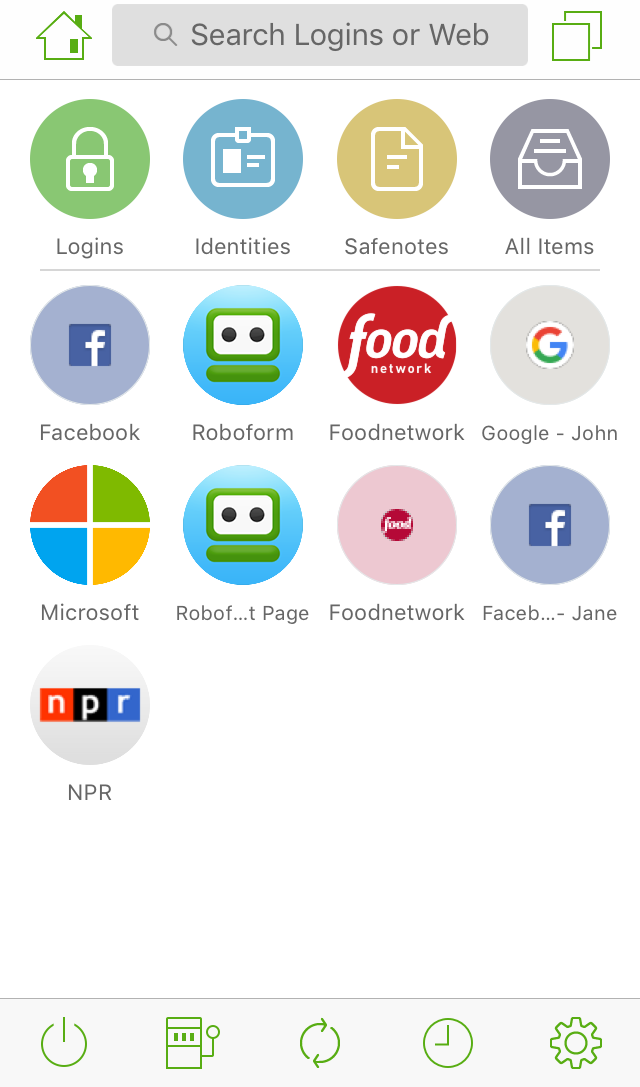
Upper Toolbar
At the top of the Offset Page is the Upper Toolbar that is visible on every page, besides the Preferences card, of the RoboForm app.

- Here are the 3 components of the Upper Toolbar:
- The Domicile Icon will take you back to the Kickoff Folio from whatsoever page yous are on.
- Search Logins or the Internet is a search box for your RoboForm Information and besides RoboForm Web Browser. Read more in Chapter 9: RoboForm Web Browser.
- The overlapping Page Icon allows y'all to open, close, and pick which tab to use in the RoboForm Web Browser. Read more in Chapter 9: RoboForm Web Browser.
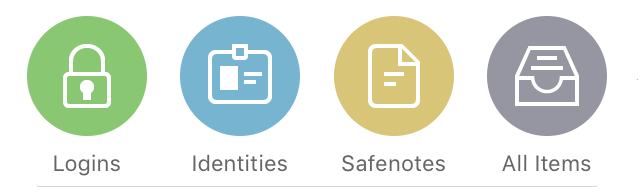
RoboForm Data Menus
Beneath the Upper Toolbar, are 4 bubbles of RoboForm Data: Logins, Identities, Safenotes and All Items. Select one to open its respective carte du jour.
- To acquire almost each menu, delight consult the following chapters:
- Affiliate 3: Logins
- Affiliate 5: Identities
- Affiliate 7: Safenotes
All Items shows all items and folders together.
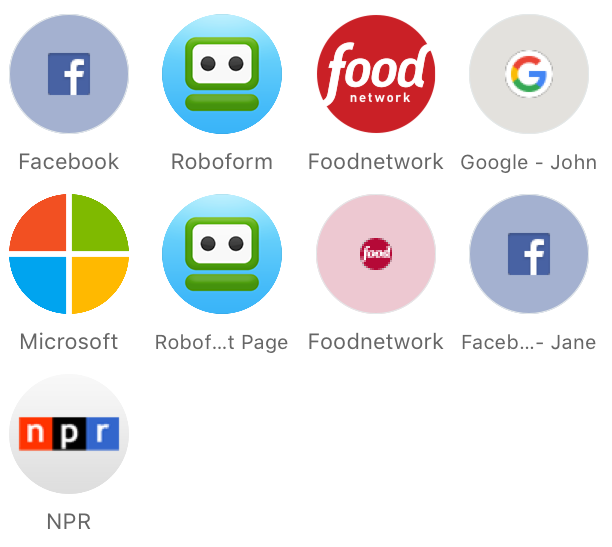
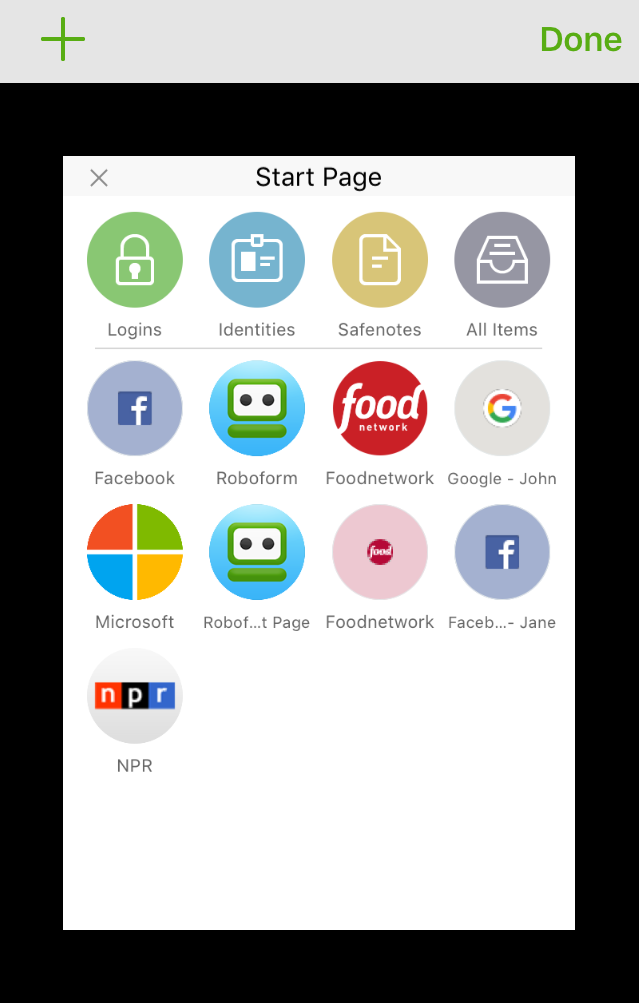
Start Page Items
This is a quick-admission carte du jour of your Pinned and Pop RoboForm Logins and Bookmarks.
How to Add together a Login or Bookmark to the Start Page
- Find the Login or Bookmark in the Logins Menu
- Hold downwardly the item so the Options appear.
- Select Add together to Start Page.
Using Start Page Items
Clicking a Login on the Starting time Page will open its web page and automatically log y'all in.
- Holding downwards a Login on the Start Page will open up the post-obit options:
- Login will open up the spider web folio in the RoboForm Spider web Browser and automatically log yous in.
- Go Fill up opens the spider web page in the RoboForm Web Browser and automatically fills the forms on the web page.
- Get To opens the spider web page in the RoboForm Spider web Browser.
- View/Edit opens the Login in the Edit Screen and allows you to view and edit the Login.
- Remove from Kickoff Page removes the Login from the Get-go Page.
- Edit Kickoff Folio allows you lot to reorganize Beginning Page Items by dragging and dropping. Click Done in the top right corner when yous are finished editing the Start Page.
Clicking a Bookmark on this page will open the web page.
- Holding down a Bookmark on this page volition open the following options:
- Go To opens the web page in the RoboForm Web Browser.
- View/Edit opens the Bookmark in the Edit Screen and allows you lot to view and edit the Bookmark.
- Remove from Start Page removes the Bookmark from the Start Page.
- Edit Start Page allows y'all to reorganize Start Folio Items past dragging and dropping. Click Done in the acme right corner when yous are finished editing the Start Page.
Lower Toolbar
The Lower Toolbar of the mobile awarding has many shortcuts.

- Here are all of its components explained from left to right:
- Logoff logs you out of the mobile application. Enter your Pivot or Master Password to enter the application once again.
- Countersign Generator is explained in Affiliate 10: Password Generator.
- Sync does a transmission sync of the RoboForm Data on your device with the server. When the sync icon turns carmine, there has been a change in your RoboForm information and it is suggesting that you sync.
- History is the log of spider web pages you lot take visited on the RoboForm Web Browser. There is a search bar at the elevation to search through your History.
- Preferences is explained in Affiliate 14: Preferences.
Affiliate 9: RoboForm Web Browser
The RoboForm Web Browser is a browser congenital into the RoboForm app that allows the use of your RoboForm data without needing to integrate RoboForm into your mobile browser.
- The RoboForm Spider web Browser tin can be opened past:
- Type a Login, website, or search inquiry into Search Logins or Spider web at the top of the page.
- Select a Login or Bookmark from the Logins Menu or Get-go Folio to open it in the Browser.
- Select a website from your History to open the website in the Browser.
Using the RoboForm Spider web Browser
Search Logins or Web Bar
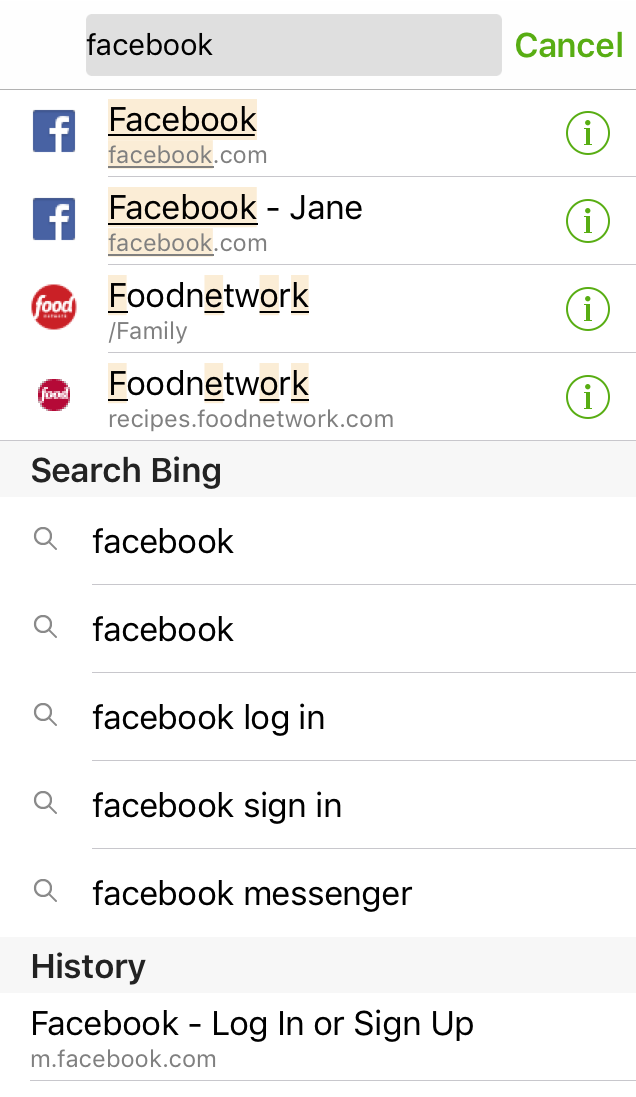
The Search Logins or Web is a search bar for your RoboForm Information and also the Address Bar for the RoboForm Web Browser. It is located in the Upper Toolbar of the app.
Typing in an inquiry volition show all RoboForm Items that match your search likewise as results from the web, search engines, and your browsing History.
- Clickinga RoboForm Item in the Search volition perform the post-obit actions:
- Logins volition automatically open and log yous into the Login's spider web page.
- Bookmarks will automatically open the web page of the Bookmark.
- Identities will open the Identity in the application.
- Contacts volition open the Contact in the application.
- Safenotes will open the Safenote in the application.
Clicking a Web or History term in the search bar will open the web page or search engine in the Browser, similar to an accost bar in other browsers.
Click the Refresh Push button to the right of the search bar refresh your web page.
Other Tools in the Upper Toolbar
- The Home Icon will take you back to the Start Page from whatever folio y'all are on.
- The overlapping Folio Icon allows you to open, close, and option which tab to use in the RoboForm Web Browser.
- The + in the peak right volition open a new tab.
- The X in the top right corner of a web folio will close that tab.
- Click Done or tap the tab if you institute the tab y'all would similar to use.
Lower Toolbar
At the bottom of the RoboForm Spider web Browser, the Lower Toolbar has many browser options.

- The right pointer goes backwards in your browser's history; the left arrows goes frontward in your browser's history. The arrows only work within the time of your browsing session.
- The Activity Icon in the heart shows the following options:
- Save Login volition open the Save Screen. Read more in Chapter 3: Logins.
- Save Bookmark will open the Save Screen. Read more than in Affiliate 4: Bookmarks.
- Generate Password will generate a new Password. Read more than in Chapter x: Password Generator.
- Print will print your web page. Y'all must have a printer set up with your device to execute this. But, select a printer, how many copies to print, and select Print.
- History is the log of spider web pages you have visited on the RoboForm Web Browser. There is a search bar at the meridian to search your History.
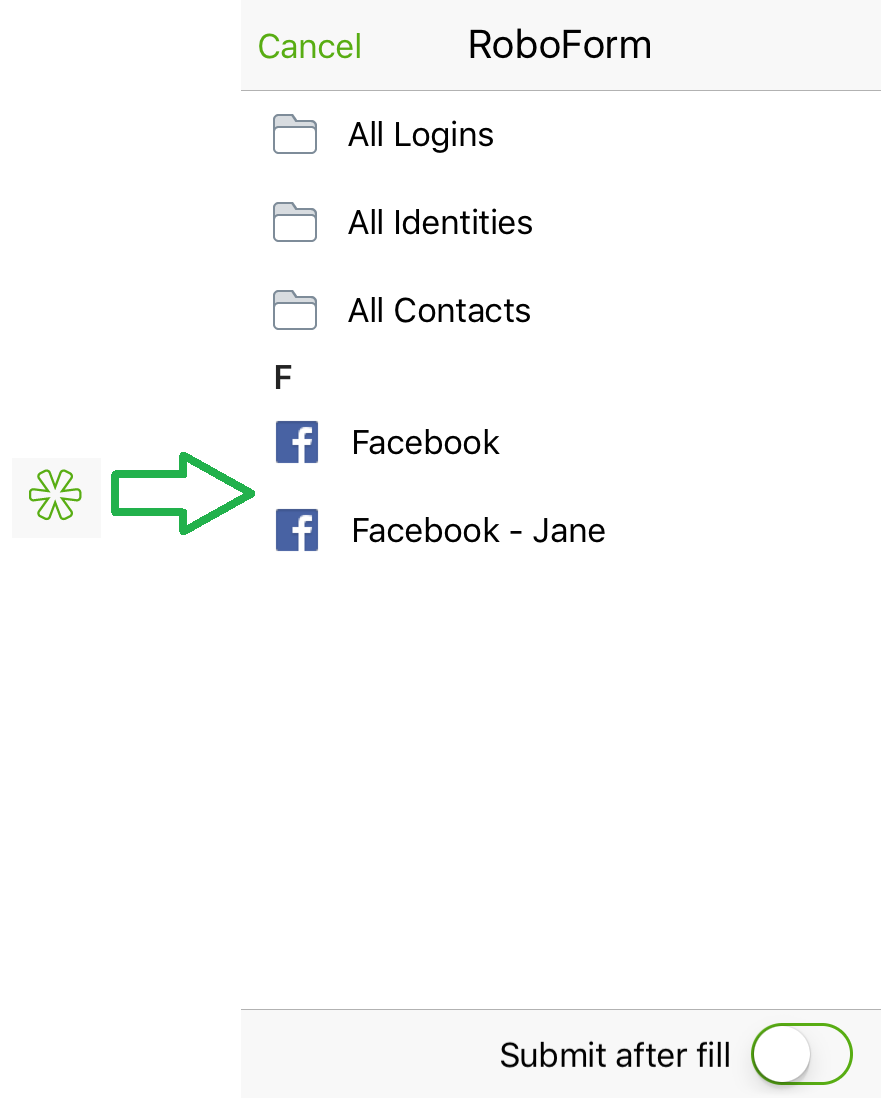
- The Asterisk Button is RoboForm's tool to fill forms on the web page you are visiting.
At the top at that place are menus for All Logins, All Identities, All Contacts. Selecting any of the RoboForm Items within these menus will make full forms of the web page you are visiting.
Below the menus, at that place are Matching Logins. These are Logins that all-time fit the web page you are visiting. Selecting one of them will fill the web page with the Login.
Submit after fill will submit or log in your forms one time you lot select the RoboForm Detail.
Affiliate 10: Password Generator
The Countersign Generator generates random, unique, and complex passwords in social club to increase your cyber security.
Open up the Password Generator by selecting the Countersign Generator button near the bottom left of the Start Page.
How to Generate a Password
- Open up the Countersign Generator.
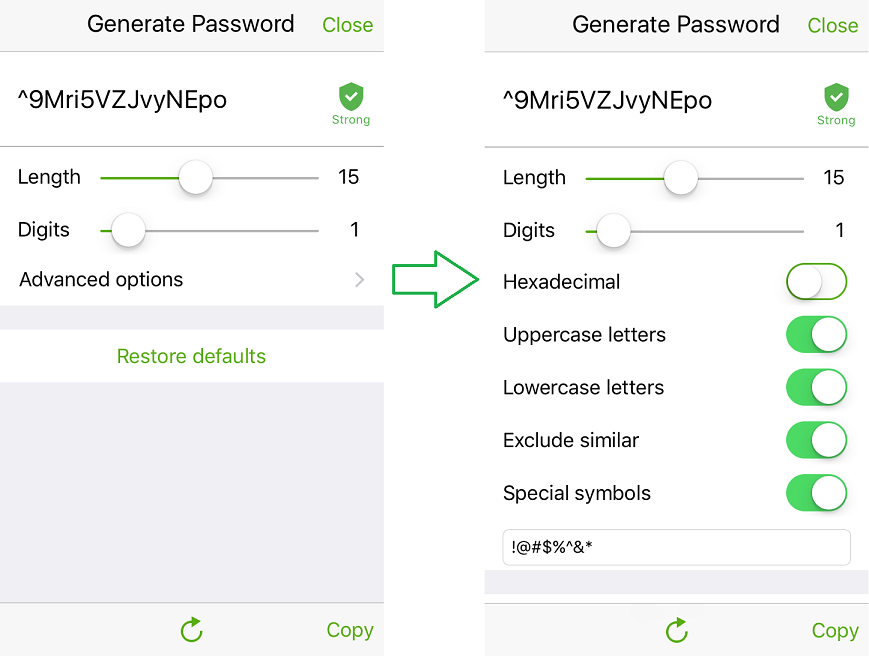
- It will automatically generate a password.
- It will accept a shield with the strength of the password (Weak, Good, Strong) to the right of the password.
- Select Copy at the bottom right if you like the password.
- If you would similar a different password, click the refresh button at the bottom center of the page.
- Or yous can accommodate the following settings:
- The Length of the password.
- The minimal number of Digits within the countersign.
- Advanced settings allows you lot to adjust.
- To use only Hexadecimal characters: 0-9, A-F. Unchecking hexadecimal character will give you a greater range of characters to use.
- Select characters like Uppercase letters and Lowercase letters.
- To exclude similar characters which removes similar looking characters. For example: I, l, 1 and O,0.
- Special symbols. Yous can change what is considered to exist a Special symbol in the text box at the bottom.
- Restore defaults volition revert Password Director to it's default settings.
- Click the refresh push to apply your setting changes and generate a new password.
- When you are happy with your new password, select Copy to copy the password. You tin can now paste it into a new account cosmos folio or change one of your weaker passwords.
Affiliate 11: Sharing and Sending
RoboForm Sharing and Sending feature allows you to securely share RoboForm Data (items or folders) with others.
Sharing and Sending uses a Public-Private Key Encryption which replaces the risky practice of sharing your Chief Countersign or emailing sensitive data.
If your recipient does not have a RoboForm, the recipient volition receive an email with instructions on how to create a costless RoboForm business relationship.
Sharing Center
This is your main tool to manage Shared items on the app.
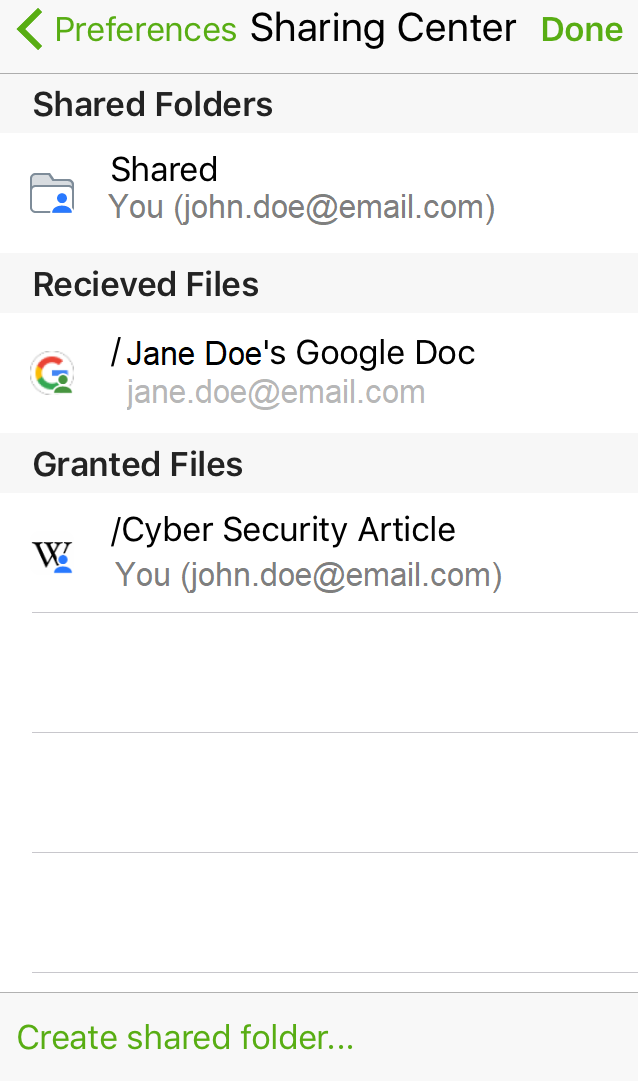
- Further sections of this affiliate will cover the specifics of sharing, here are the principal components of the Sharing Center:
- Preferences goes back to the Preferences page.
- Washed goes dorsum to the First Page.
- In that location are 3 categories in the Sharing Centre:
- Shared Folders, which you can learn well-nigh below in Sharing a Binder.
- Received Files are files that somebody else sent to yous. They are denoted by a green icon and their sender'southward email.
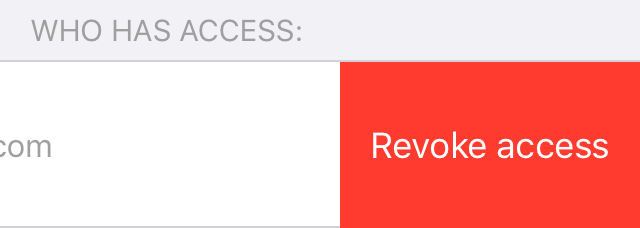
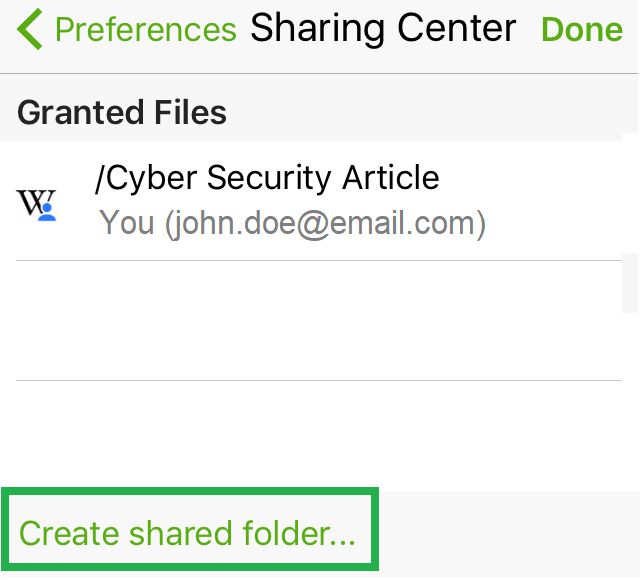
- Granted Files are files that you sent to another person. They are denoted by a blue icon and your email.
- Create shared binder… creates a shared folder and is further discussed below.
Sharing
Sharing volition requite the recipient access to the data , and any changes (E.g. changing a password) accesswill be reflected in their copy of the data. Access to the shared information can be revoked at whatever time. The sender may cull multiple recipients.
How to Share RoboForm Information
To Revoke Shared Data, slide the email of the recipient to the left, select Revoke Admission.
Sharing a Folder
Creating a Shared Folder will let yous share multiple RoboForm items with its recipients. Access to the shared folder can exist revoked at any time. The sender may cull multiple recipients.
Annotation: Everywhere users can simply create one shared folder. Business Users can create multiple.
- How to Create A Shared Folder
- Open Preferences > Sharing Heart.
- At the lesser, click Create shared folder…
- Proper name your new Shared Binder.
- Click OK.
- How to add RoboForm Items into a Shared Folder
- Notice the RoboForm Item in All Items or its respective menu (e.g. Logins Menu).
- Hold down the item, and in the card that pops up, select Move.
- Select the shared folder.
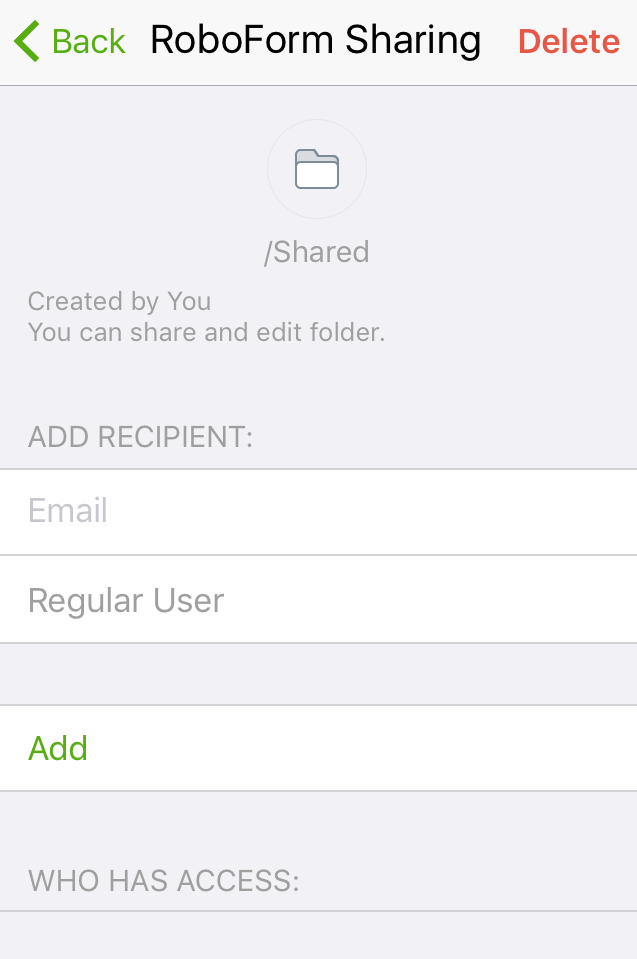
- How to Utilise a Shared Folder
- Open the Shared Folder from the Sharing Centre.
- Enter the recipient's email.
- If your recipient does not have RoboForm, they will exist emailed instructions on how to create a free RoboForm account.
- Select their Function or permission level below the email. The permission levels are explained in detail beneath.
- Select Server Only to have the data just be on the server, and not locally on the device.
- Select Add.
- The recipient will be shown under Who Has Admission with their email and permission level.
- If the recipient received and accustomed the request their email will exist nether Who Has Access.
- If the recipient hasn't received the request, their status volition be Not Recieved Yet.
- If they deny the request, their proper noun will be removed from Who Has Access.
- The sender can cull i of 3 different permission levels for the recipient:
- Limited: The recipient will not be able to edit or share RoboForm items in the Shared Folder. Logins tin can only be used to log in to websites, applications, and mobile apps - the passwords cannot be viewed in the Editor. Identities and Safenotes can be viewed in the Editor.
- Regular: The recipient tin can view and edit RoboForm items in the Shared Folder, and the changes they make volition be propagated to other recipients and to the sender.
- Owner: Full admission rights. In add-on to being able to view and edit all items, the recipient can conform permission levels, too as add or remove other recipients (including the original sender).
To Revoke Shared Information, slide the electronic mail of the recipient to the left, select Revoke Admission.
Sending
Sending RoboForm Data is similar to sending an e-mail. The RoboForm data is sent once, any changes won't be updated (East.g. irresolute a password) to the recipient and access to the sent data tin't be revoked. You tin can send an item to multiple recipients.
How to Send RoboForm Information
If you have received a sent item and have it, y'all will find it in All Items or its respective carte (e.g. Logins Card).
Chapter 12: Security Center
The Security Center identifies whether your passwords stored in RoboForm are unique, complex, and randomly generated. It further suggests which of your passwords should be changed and fabricated stronger. 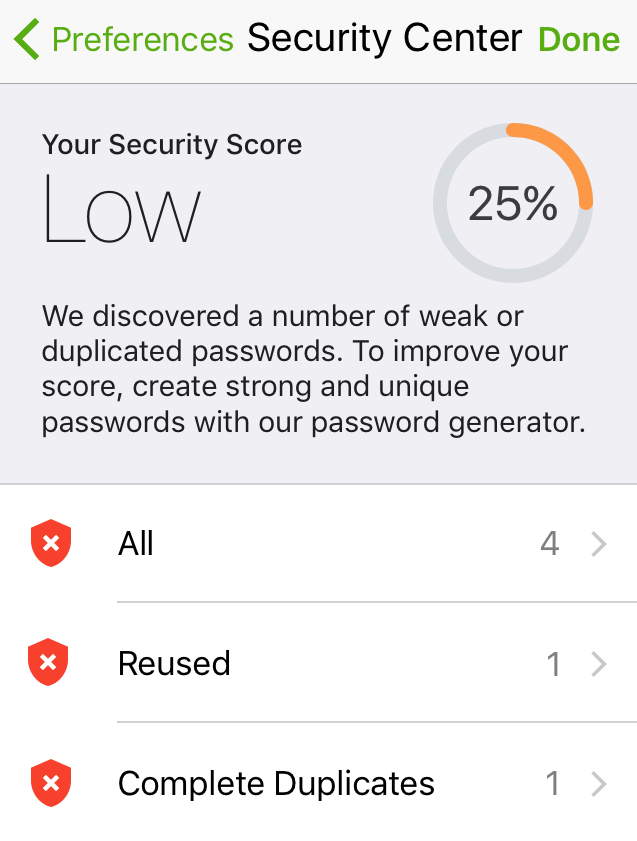
Security Eye is located in the Preference Card.
Understanding the Security Eye
Security Score
Your Security Score is shown at the elevation of the page. The per centum score, rating (eg: "Skillful"), and description stand for the commonage strength of all of your individual passwords. The rating of the Security Score has a range of Depression (0-25%), Boilerplate (26-l%), Good (51-75%), and First-class (76-100%).
Individual Logins
Below the Security Score at that place are three tabs that break down your Individual Logins. The tabs with cherry-red shields have items lowering the Security Score, while dark-green shields satisfy the Security Score examination.
The first tab is labeled All. When you open up this tab, it will show you all the Logins and identities their Strength Ranking: Weak (reddish shield), Skillful (orange shield), or Potent (light-green shield). Past default, the Weak Logins are listed starting time.
The levels of Countersign Strength for individual passwords are determined by the zxcvbn algorithm, which is based on entropy or unpredictability. The force ratings for private passwords have a range of Weak (0-25%), Medium (26-l%), Good (51-75%), and Strong (75-100%). In club to achieve a Stiff Password Force rating, create a unique and complex password.
Clicking on an Private Countersign volition open the Edit Screen.
Reused Passwords
The heart tab is labeled Reused and lists multiple Logins with identical passwords. The number in this tab represents the amount of unique passwords that have been reused for multiple websites. Logins are organized under Groups with Reused Passwords; each Group consists of Logins that share the aforementioned password.
Duplicated Logins
The last tab on the correct is labeled Complete Duplicates and shows Logins with identical usernames and passwords for the same website. The number in this tab represents the amount of username/password combinations that accept been saved more than once.
Complete Duplicates do not affect the Security Score, but have their own tab then the user can easily delete Complete Duplicates saved to RoboForm.
How to Meliorate your Security Score
- In order to better the strength of your passwords and increase your Security Score, follow these steps:
- Log in to a website that has a Weak score.
- Find the Account or Settings folio where you lot can change your countersign.
- Select the Password Generator in your Lower Toolbar. Read more in Chapter 10: Password Generator.
- Recall to save the newly generated password in RoboForm.
Going through this process for all your weak passwords will better secure your information and improve your security score.
Chapter xiii: Emergency Access
In case of an emergency, such every bit incapacitation or death, it could be vital to have a trusted person obtain access to your medical, fiscal, and other of import data. With Emergency Access, you tin ready measures for a pre-approved contact to securely receive access to your RoboForm Information after a certain time period passes.
Emergency Admission uses public-private key encryption, similar to our Sharing and Sending features. This allows for secure admission by the recipient without the grantor'due south Main Countersign.
To open up Emergency Access and its settings, select information technology in the Preference bill of fare.
Brand sure to ready up Emergency Admission as presently as possible to ensure y'all are prepared for an emergency. Setting upward Emergency Admission is explained below.
How to Set up Emergency Access
How to Use Emergency Access
Chapter xiv: Preferences
Preferences host all the settings for RoboForm, besides every bit functions within the RoboForm app.
Observe the Preference Carte by selecting the gear icon on the Start Folio.
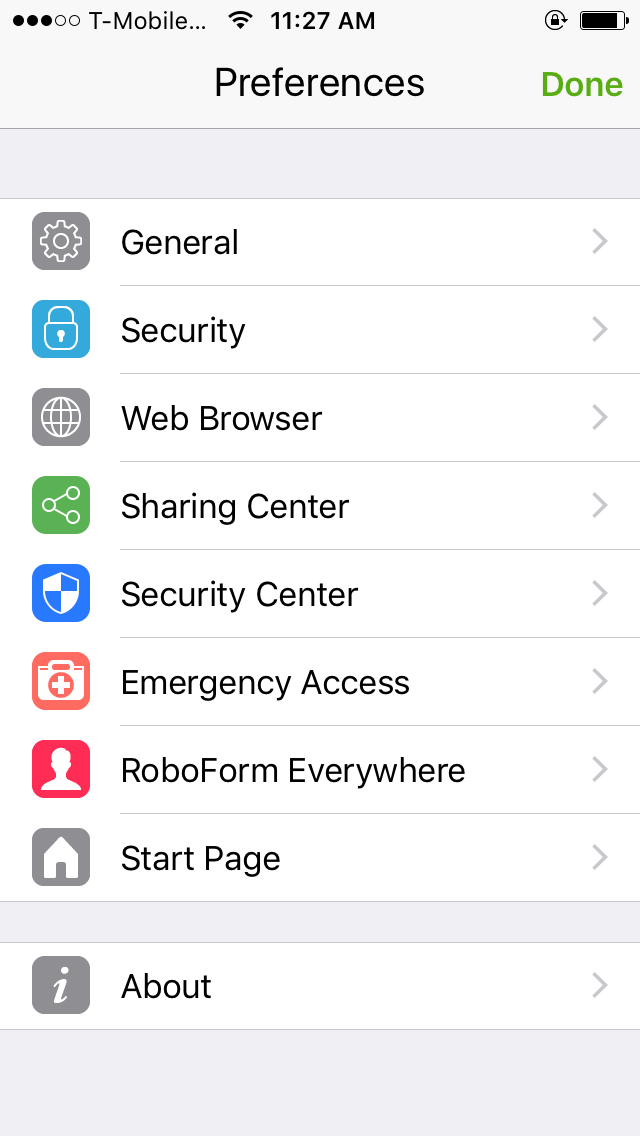
The next section will go through each tab of the Preference Menu.
General
- Logins Beliefs controls how Logins function inside the app.
- Open up Logins in Browser will open up the Login in the RoboForm Web Browser. Unselecting this will open up the Edit Screen of the Login.
- Show All Fields for Logins will prove additional fields in your Login. Unselecting this will merely show the username, the password, and the notation in a Login.
Startup has the option for what tabs you lot would like to be open when you lot start the awarding. Commencement with Recent Tabs will open the tabs that were previously opened on the application.
- Smart Search regulates how your Search Bar at the superlative of the Beginning Folio and the RoboForm Web Browser announced.
- Search Engine will permit yous select which search engine the Search Bar uses.
- Search Suggestions will give you suggestions from search engines of what to wait upwardly.
- Fuzzy Search provides similar or properly-spelled search terms within the search engine.
Security
- RoboForm Unlock Mode is the method that you utilize to unlock the RoboForm Application.
- Unlock Mode allows you lot to choose between using your Master Countersign, a pin, or having no authorization style - this is not recommended.
- If you have a Pivot, in that location will exist an choice to Change Pin. But blazon it and retype information technology to change your pin.
Automatic-Logoff manages how long you stay logged into your RoboForm. Logoff on Close is the pick to accept your RoboForm log-off when you close the application; yous must enter your authority method again if Logoff on Close is on.
Change Master Password allows y'all to alter your Master Password. Afterward clicking it, simply type in your old Principal Password and enter your new Main Password twice to change it. It is very important that y'all memorize your Master Password.
Web Browser
Content shows the selection to Open up Mobile Sites inside the RoboForm Web Browser.
- AutoSave has options for how to Salve logins on the application.
- AutoSave Logins volition pull up the Save Screen automatically when you salve a new Login. Read more in Chapter 3: Logins.
- Block Domains is a list of domains that RoboForm volition non ask to save Logins automatically for. Delete a blocked domain by swiping it to the left and clicking Delete.
- Domain Equivalence
- ⦁ Some websites utilize the same Logins or Business relationship for different URLs. These are chosen Mirrors; E.g. Bank of America uses mbna.com, bankofamerica.com, bofa.com, and usecfo.com.
- Domain Equivalencies simplifies this past creating a unmarried Login for multiple sites.
- Only create a New Group and add together each private domain by clicking the " + ", e.g. "mbna.com and bankofamerica.com". These settings will and so utilize in Matching Logins.
- Delete a Domain Equivalency by clicking the " - ".
Articulate Cookies and History will delete the cookies and the history from the RoboForm Web Browser.
Sharing Center
Read about the Sharing Center, Sharing, and Sending in Affiliate 11: Sharing and Sending.
Security Center
Read about the Security Center in Chapter 12: Security Center.
Security Center
Read about Emergency Admission in Chapter 13: Emergency Access.
RoboForm Everywhere
This tab has Sync and Account options. For other Sync and Account options, get to Affiliate 15: RoboForm Online.
Your Email for your RoboForm Account will be listed at the tiptop.
Sync Automatically will automatically sync your device and your RoboForm business relationship whenever you open up the app, edit or salve an detail, or enter the Master Password. Uncheck this if you want to do manual sync.
Change Account will log you out of this RoboForm Business relationship on your Application. Annotation that your current RoboForm data won't exist kept on the device if yous Change Accounts.
First Folio
This tab has Offset Page options.
Sync my Beginning Folio will do an automated sync of your device and your RoboForm account whenever you open the app, edit or save an item, or enter the Master Password.
Edit Start Page will allows you to reorganize Start Page Items past dragging and dropping. Click Washed in the top right corner when y'all are finished editing the Kickoff Page.
About
Virtually shows the version of RoboForm that you are using and your Device ID.
- There are also these following options:
- Review on App Store opens RoboForm in the app store. Please let us know what you call back!
- Transmission opens the web page for the RoboForm manual.
- Back up opens the web page for the RoboForm Support Organisation.
- How to Submit a Back up Ticket
- Click Support from the Nearly page of your RoboForm awarding.
- Enter the email associated with your RoboForm account.
- Yous volition be redirected to the settings page. Enter your proper noun and telephone number and click Submit. This data will just be used for support purposes.
- Scroll to the bottom, type your message, and submit your ticket. Click here to directly admission the online back up system.
- Open Source displays a list of open source software licenses used in the development.
Chapter 15: RoboForm Online
RoboForm Online is covered in the RoboForm Windows Manual which can be found at roboform.com/manual.
Chapter sixteen: RoboForm Security
RoboForm Security is covered in the RoboForm Windows Manual which can be institute at roboform.com/manual.
Source: https://www.roboform.com/manual-ios
0 Response to "How Can I Printout All the Cards in Roboform"
Post a Comment